Using the Eastron 3-Phase Energy Meter With a Sunsynk 1-Phase Inverter
Summary
This article explains how to correctly wire and configure an Eastron 3-phase energy meter for use with a single-phase Sunsynk inverter. This setup allows accurate monitoring and control when only one phase is used.
1. Wiring Instructions
Follow the steps below to wire the Eastron meter correctly:
1.1 Power Connections
Connect Live to Port 4 (L1).
Connect Neutral to Port 1 (N).
1.2 Bridging Connections
Create a bridge between Port 1 (N) and Port 6 (NA).
Create a bridge between Port 4 (L1) and Port 5 (LA).

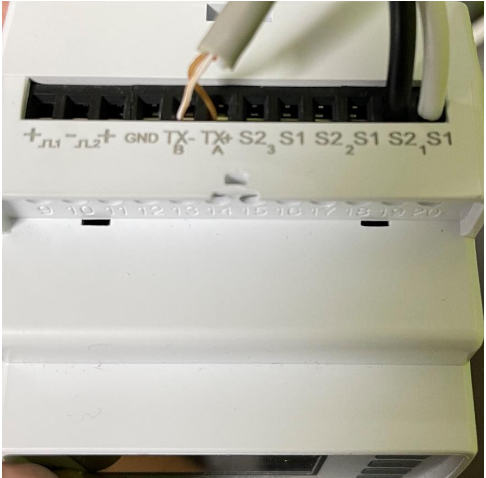
1.3 CT Coil Connections
Connect the CT coil black wire to Port 19 (1-S2).
Connect the CT coil white wire to Port 20 (1-S1).
1.4 Communication Wiring (CAT-5 Cable)
From the CAT-5 cable, use brown and brown/white wires only.
Move or cut back the unused wires.Connect brown to Port 14 (TX+A).
Connect brown/white to Port 13 (TX-B).
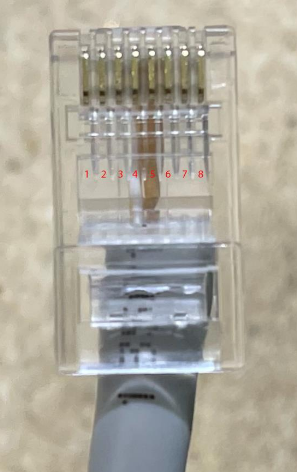
1.5 RJ45 Termination
On the opposite end of the CAT-5 cable:
Insert brown/white into Pin 4 of the RJ45 connector.
Insert brown into Pin 5.
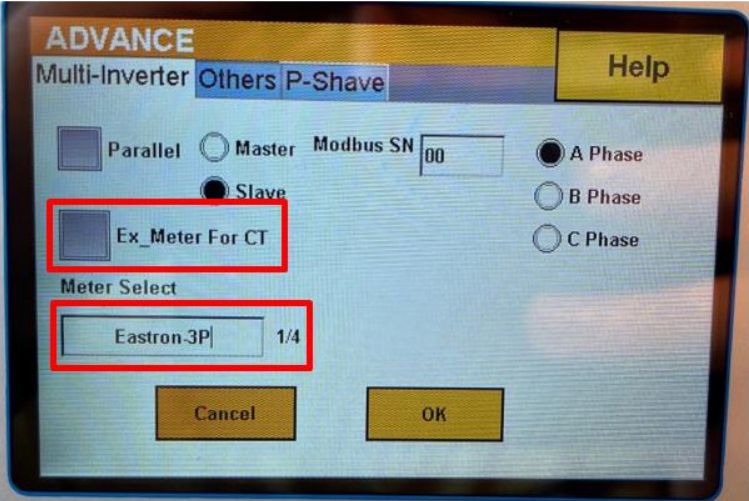
2. Enabling the Meter in the Inverter Settings
Once wiring is complete, enable and configure the meter on the Sunsynk inverter:
On the inverter screen, select the Settings (cog icon) in the top right.
Select Advanced.
Select Multi-Inverter.
For CT, choose EX_Meter.
Select the correct Meter Model from the list.
Was this article helpful?
That’s Great!
Thank you for your feedback
Sorry! We couldn't be helpful
Thank you for your feedback
Feedback sent
We appreciate your effort and will try to fix the article